Introduction
This book is a comprehensive tutorial to get started in developing applications for the GNOME platform in Vala, making use of GTK4 and Adwaita.
We will dive deep into how projects are structured and make use of Meson as our build tool and include guides for Flatpaks as well in an attempt to make this tutorial as practical as possible for real world use.
Additonally, there will be a section for recipes, which will include examples to solve a specific problem which may come in handy on your journey later on.
The GNOME Platform
This book will primarily target GNOME by using their style guidelines and the Adwaita library, but the general structure of the guide can still be helpful for creating generic GTK4 programs or using another platform like elementaryOS with their Granite library but it’s up to the reader to replace the parts accordingly.
GNOME as a platform consists of many parts such as:
- GLib: Provides many general purpose utilities that is used throughout GNOME technologies.
- GObject: Object oriented library that many of GNOME’s projects are built on.
- GTK: Widget toolkit library built on top of GLib and GObject
- Adwaita: Additional GNOME specific widgets and styling built on top of GTK.
You do not need to be using GNOME as your desktop, as long as you have the necessary libraries, applications built for GNOME will run on any Linux distribution and desktop environment and even on macOS and Windows!
Why Vala?
Vala is a programming language also built by the GNOME team, its syntax is inspired by C# and is built to leverage GLib and GObject at its core, it also includes out of the box bindings for many libraries including all of the GNOME stack such as GTK.
Since GTK is built around GObject, using GTK bindings in another programming language also comes with its burden of having to correctly manage GObjects in said language which may not always feel idiomatic.
Since Vala is built exactly to leverage GObject and interoperate in this world, it makes an excellent choice to develop programs using GTK.
Even if you choose to use a different programming language in the future, the experience you will learn here will come in handy.
Installation on Linux
This page will detail the required packages to setup a development environment on Linux.
Keep in mind though that distribution’s packages may get outdated, especially for distros like Debian and we recommend using Flatpak as a development environment to keep a consistent environment across any distro.
This is generally less of an issue if creating a generic GTK application, but GNOME’s Adwaita for example evolves pretty quickly and you want to have access to the newest widgets in your application.
That said I also recommend installing the tools for your distro as well to follow along as we will introduce flatpak integration much later in the series.
Flatpak
- Install Flatpak
- Install the GNOME SDK:
flatpak install flathub org.gnome.Sdk//47 - Install the Vala SDK:
flatpak install flathub org.freedesktop.Sdk.Extension.vala//24.08
For Visual Studio Code users we also recommend installing the Flatpak Extension
Debian/Ubuntu
This also applies to distributions based on Ubuntu, such as Linux Mint, popOS!, ZorinOS and so on.
sudo apt-get install build-essential valac meson libgtk-4-dev libadwaita-1-dev
Fedora/RedHat
TODO
Arch Linux
TODO
Hello, World!
Let’s begin by exploring the Vala language and how we can start building stuff.
Create a directory to store our project files, let’s create a file called hello.vala and inside it we include:
int main (string[] args) {
    stdout.printf ("Hello, World!\n");
    return 0;
}
The first thing to realize is that Vala requires a main entry point to start executing from, if you are coming from C this will be very familiar.
To run this, we use the valac (Vala Compiler) command:
valac hello.vala
And now we can execute it:
./hello
This should print out Hello, World! as expected.
Behind the scenes Vala compiles down to C and then gets passed on to a C compiler, if we want we can easily inspect the generated C code by telling the Vala compiler to give us the generated C code:
valac -C hello.vala
The result is a hello.c file that we can see what Vala has generated for us.
Because of this, Vala is built around C and often interacts with C code so having a good foundation of programming in C can be helpful in easing the learning curve, but nonetheless Vala is a much higher level language thanks to GLib’s constructs, so it should still be managable without any experience in C.
Congratulations! You’ve had your first taste of Vala, in the next lesson we will start getting serious and get a GTK application up and running.
Hello GTK!
In this lesson we are finally ready to harness the power of GTK within Vala.
Create a main.vala:
int main (string[] args) {
    // Code goes here...
    return 0;
}
That’s our starter template, in the following sections we will focus on what to add in there and will be hiding the additional lines by default but you can choose to expand the codeblock when you desire by clicking on the eye icon.
First we create an instance of Gtk.Application this will be our main application instance that’s responsible to manage everything.
int main (string[] args) {
    var app = new Gtk.Application ("com.example.test", ApplicationFlags.DEFAULT_FLAGS);
    return 0;
}
To construct a Gtk.Application we need two things, an Application ID and flags determining some behaviors of the application, such as its capability to open files.
In this example we chose com.example.test and specified the default flags using ApplicationFlags.DEFAULT_FLAGS.
Note: If you are running an older GLib version
ApplicationFlags.DEFAULT_FLAGSmay not exist, in that scenario useApplicationFlags.FLAGS_NONEwhich was deprecated since glib 2.74
For choosing an Application ID, refer to the GNOME Developers Documentation on Application ID
We can now run the application using app.run () this also conveniently returns an exit code so we can replace that return 0; with the code returned by the application’s exit code:
int main (string[] args) {
    var app = new Gtk.Application ("com.example.test", ApplicationFlags.DEFAULT_FLAGS);
    return app.run ();
}
We can now try compiling and running our progress so far, but now since we used GTK, we need to tell Vala to bring in the GTK bindings which is pretty easy:
valac --pkg gtk4 main.vala
We specified --pkg gtk4 to bring in the gtk4 bindings before compiling main.vala
Now try running it with ./main and it doesn’t really do anything, you will probably get a warning like:
(main:131173): GLib-GIO-WARNING **: 03:41:38.246: Your application does not implement g_application_activate() and has no handlers connected to the 'activate' signal. It should do one of these.
What does this mean? Well our application is currently not doing anything at all, and GTK is warning us that we should probably handle the activate signal which is triggered when the application starts and do something.
So let’s stop being a ghost and actually display something, what do applications normally display? A Window that is, yes.
In Vala signals can be accessed like properties, so we can just access it via app.activate and then signals provide a .connect method we can use to attach a signal handler so we can do:
int main (string[] args) {
    var app = new Gtk.Application ("com.example.test", ApplicationFlags.DEFAULT_FLAGS);

    app.activate.connect (() => {
        // Do stuff.
    });

    return app.run ();
}
So this signal triggers when the application has activated and signals that we are ready to display our windows so let’s just do that:
int main (string[] args) {
    var app = new Gtk.Application ("com.example.test", ApplicationFlags.DEFAULT_FLAGS);

    app.activate.connect (() => {
        var window = new Gtk.ApplicationWindow (app);
        window.present ();
    });

    return app.run ();
}
Here we created a window using the Gtk.ApplicationWindow which is basically a Gtk.Window but with some extra functionality to work better with the application instance, this is the perfect class for presenting the main application window.
The Gtk.ApplicationWindow takes one parameter which is the application itself, so we give it that.
Lastly windows are created hidden by default so we need to present them to the user.
Now try to build and run the application again, you remember the command right? Jeez, just scroll up.
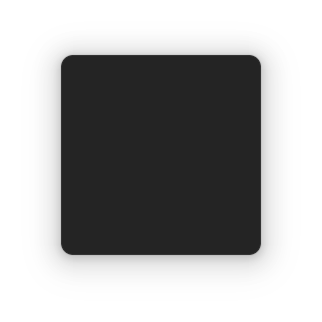
This time we should finally have a window!
Behold! Our application is alive! Okay, I admit that’s not really interesting, we got a blank window that does nothing at all.
Widgets
GTK is a widget-toolkit, meaning that the UI is composed of a hierachy of objects known as widgets. Widgets can be many things such as buttons, text, checkboxes, etc.
Some widgets behave as “containers” meaning they can hold one or more widgets inside itself (“children”) while others are standalone widgets like a button.
The Gtk.ApplicationWindow we created earlier is a container widget, it is currently empty but let’s try adding a widget onto it:
int main (string[] args) {
    var app = new Gtk.Application ("com.example.test", ApplicationFlags.DEFAULT_FLAGS);

    app.activate.connect (() => {
        var window = new Gtk.ApplicationWindow (app);

        var button = new Gtk.Button ();
        button.set_label ("Hello, World!");

        window.set_child(button);
        window.present ();
    });

    return app.run ();
}
Running this results in:
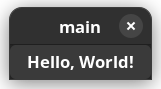
- The first line creates a
Gtk.Buttonwidget, widgets are just objects or classes so they can be constructed withnew - The second line uses the
set_labelmethod of the button widget to give it a text label, each widget will have its own set of behaviors and methods to interact with. - The third line sets the button as the window’s “child” so it is shown as part of it, note that the window only accepts one child.
Because the window can only contain one child, we usually use a layout widget as the root child of the window such as a list, box or a grid and lay the rest of our UI components within those.
A simple one to start with is Gtk.Box which contains multiple items and presents them with a given orientation: vertically or horizontally.
For example if we wanted to display two buttons on top of each other (vertically) we’d use a box like so:
int main (string[] args) {
    var app = new Gtk.Application ("com.example.test", ApplicationFlags.DEFAULT_FLAGS);

    app.activate.connect (() => {
        var window = new Gtk.ApplicationWindow (app);
        var box = new Gtk.Box (Gtk.Orientation.VERTICAL, 5);

        var button = new Gtk.Button ();
        button.set_label ("Hello, World!");

        var button2 = new Gtk.Button ();
        button2.set_label ("Here's one more");

        box.append (button);
        box.append (button2);

        window.set_child(box);
        window.present ();
    });

    return app.run ();
}
This will result in:
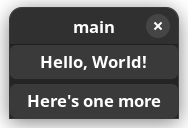
- A box is created with
new Gtk.Box (), this widget takes 2 things, an orientation horizontal (Gtk.Orientation.HORIZONTAL) or vertical (Gtk.Orientation.VERTICAL) and a spacing which is set to5here to give some room between elements so that the two buttons aren’t touching each other. - A box is a container that can hold multiple widgets, in this case we can use the
appendmethod of the box to add children - Finally we set the box as the window’s root child so it can display the box that contains more widgets than one.
This is how UI applications are laid out, in a tree-like structure where it starts with the window and then widgets branch out with more children containing sub-elements that compose the view hierarchy.
You can check out a list of widgets that Gtk has to offer in the Widget Gallery
Signals
An important part of GTK is the ability to listen to signals and act on them, we’ve already seen a signal which was the activate signal of the Gtk.Application this signal is triggered to signal that GTK is fully activated and we are allowed to start displaying widgets so that’s where we start showing our window.
Signals are similar to what may be called “events” and “event handlers” in other languages and frameworks.
Likewise many other widgets out there may have various signals to notify us of something that happened within it, a good example is the Button widget we’ve already used, what good is a button that does nothing? That’s where signals come in, buttons have a clicked signal that fires when it’s pressed so let’s listen to it and act on it.
int main (string[] args) {
    var app = new Gtk.Application ("com.example.test", ApplicationFlags.DEFAULT_FLAGS);

    app.activate.connect (() => {
        var window = new Gtk.ApplicationWindow (app);

        var button = new Gtk.Button ();
        button.set_label ("Hello, World!");
        button.clicked.connect (() => {
            stdout.printf ("Button Pressed\n");
        });

        window.set_child(button);
        window.present ();
    });

    return app.run ();
}
This connects into the button’s clicked signal and in response prints a message to the standard output, now when you press the button you should start seeing the message in your terminal!
Conclusion
In this chapter we learned a decent amount to get started, including how to construct object instances in Vala using new and the basics of GTK Widgets and how they are laid out and nested.
We’ve also seen the basics of ‘signals’ which may be called ‘events’ on some other languages, signals can be connected to run some code upon activation of that signal.
In this case the application emits the activate signal to notify us that it’s ready and we connected to that signal so that when it happens we create our top level application window and present it.
Signals are used a lot throughout GTK such as when listening for button clicks and so on, therefore it’s important to get comfortable working with them later on.
Hello, Adwaita
In this lesson we will be taking a look into GNOME’s Adwaita library, it brings us styles and widgets that are more inline with GNOME’s Human Interface Guidelines (HIG)
This is the part that makes us say that we are developing a ‘GNOME Application’ since we are now following GNOME’s HIG and using their set of looks and styles.
If you want to build a generic GTK4 application that does not rely on a specific platform look, that’s also fine and you can skip this chapter but be prepared to have alternatives to anything Adwaita related we may use.
Likewise some users may prefer to target a different platform, for example elementaryOS is another common target and they include their own library called Granite, so you may replace Adwaita with some stuff that they offer instead.
To get started with Adwaita it’s as simple as replacing our Gtk.Application and Gtk.ApplicationWindow with ones that come with Adwaita like so:
int main (string[] args) {
    var app = new Adw.Application ("com.example.test", ApplicationFlags.DEFAULT_FLAGS);

    app.activate.connect (() => {
        var window = new Adw.ApplicationWindow (app);
        window.present ();
    });

    return app.run ();
}
To build our code we now need to include the dependency for Adwaita
valac --pkg gtk4 --pkg libadwaita-1 main.vala
Now if we run our program, something unexpected happens:
We get a blank window that we can’t close! There are no window decorations, so you should send CTRL + C from your terminal to close the window or use some shortcut for closing windows such as Alt + F4
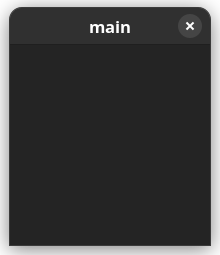
This is because Adwaita’s ApplicationWindow behaves a little differently and requires us that we include the HeaderBar ourselves.
For now we can include an Adw.HeaderBar inside a vertical box so that it can contain a headerbar and the rest of our elements.
int main (string[] args) {
    var app = new Adw.Application ("com.example.test", ApplicationFlags.DEFAULT_FLAGS);

    app.activate.connect (() => {
         var window = new Adw.ApplicationWindow (app);
         var box = new Gtk.Box (Gtk.Orientation.VERTICAL, 5);

         var button = new Gtk.Button ();
         button.set_label ("Hello, World!");

         box.append (new Adw.HeaderBar ());
         box.append (button);

         window.set_child (box);
         window.present ();
    });

    return app.run ();
}
Running this however causes a crash!
(main:176796): Adwaita-ERROR **: 03:23:18.945: gtk_window_set_child() is not supported for AdwWindow
What happened? It’s just a special exception that Adwaita’s window wants you to set a different property to include children and one is not supposed to use set_child directly.
This property is called content and so we can set it using set_content
int main (string[] args) {
    var app = new Adw.Application ("com.example.test", ApplicationFlags.DEFAULT_FLAGS);

    app.activate.connect (() => {
         var window = new Adw.ApplicationWindow (app);
         var box = new Gtk.Box (Gtk.Orientation.VERTICAL, 5);

         var button = new Gtk.Button ();
         button.set_label ("Hello, World!");

         box.append (new Adw.HeaderBar ());
         box.append (button);

         window.set_content (box);
         window.present ();
    });

    return app.run ();
}
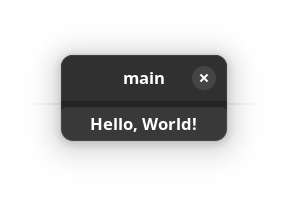
And we are back to something that looks similar to what we had in the earlier chapter:
Conclusion
This was a quick chapter on integrating libadwaita with your program, so far not a lot has changed but libadwaita contains a lot more widgets that can really make your application look nicer and provide additional functionality and save time.
You can also browse Adwaita’s Widget Gallery to get an idea of what is possible!
But Adwaita is completely optional, if you are trying to stay desktop agnostic, want to use another widget library or just don’t like Adwaita, then feel free to omit this part.